
BYOPumpkin Craft Night
The Idea —
Fall schedules are busy enough, so I love fitting a craft night in post-bedtime on a weeknight! A weeknight get-together has a lower bar in the best way. Nobody's expecting a seated dinner on a Tuesday. You can provide some sweet treats, a nice drink and get to crafting right away!
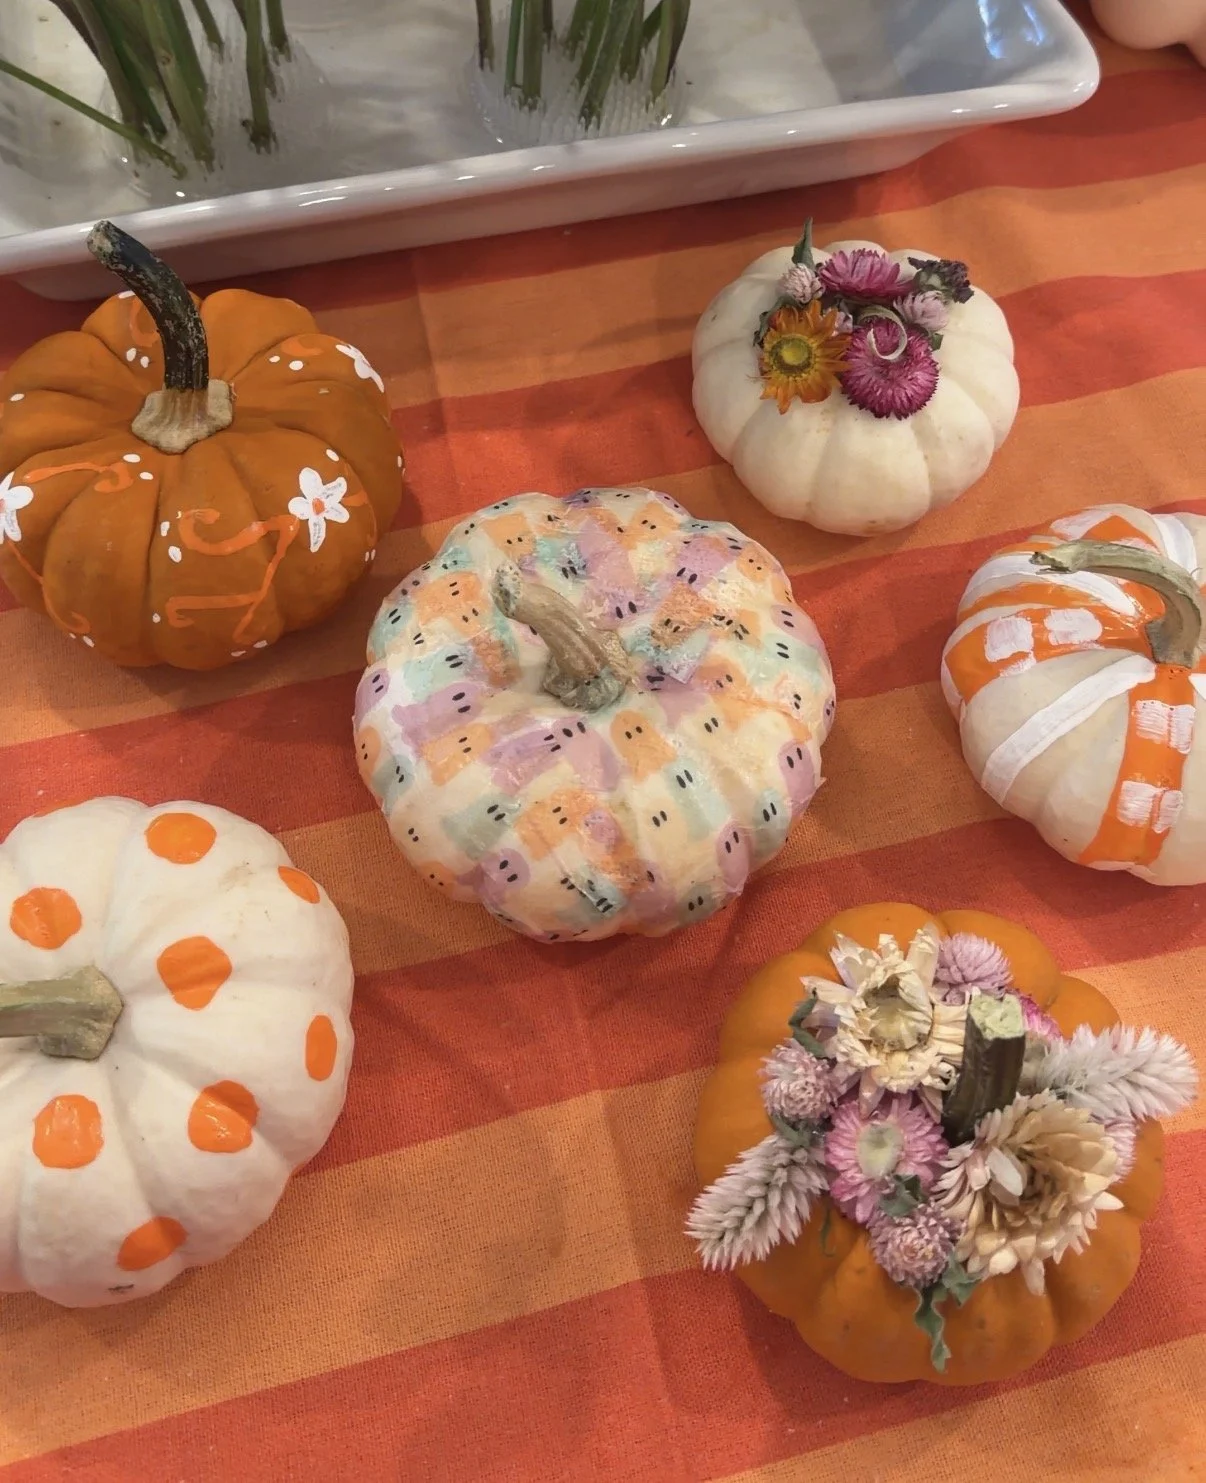
Pumpkin decorating is a classic fall craft and I didn’t wait to pigeon hole us into one style so I provided three ways to decorate. All of them easy, none of them requiring anyone to be crafty: hot glue dried flowers onto your pumpkin, paint it, or mod podge a pretty napkin onto it. Every single person went a different direction and they all came out so cute! I love that everyone got to pick which style fit their vibe best!
How I Prepped —
I used a mix of real and faux pumpkins. For a craft I spend a lot of time OR money in materials on, I’d like for it to last longer than a few months, meaning I’d use a faux pumpkin.
Faux pumpkins are the right base for the napkin and dried flower ones. Glue and mod podge grip them, they don't sweat, and your friend gets to keep it and pull it out again next October. Real pumpkins are better for paint — the surface takes acrylic beautifully, and since a real pumpkin has a shelf life anyway, you're not putting work into something that's going to collapse on a porch in six weeks.
If you're painting real ones, wash them and dry them completely first. There's a slick film on a grocery store pumpkin and paint will slide right off it.
I put everything out on one long table with a tablecloth down, because hot glue and mod podge both find their way onto the wood. Pumpkins in the middle, supplies spread out, everyone grabs what they want!
Supplies & How To —
Supplies:
(This post contains affiliate links — if you buy through them I may earn a small commission, at no cost to you)
pumpkins, a mix of real and faux. One per guest, plus a couple extra!
dried florals (I used mainly strawflower and gomphrena from my garden)
a hot glue gun and plenty of sticks (I love my cordless!)
craft acrylic paint and a set of cheap brushes
pretty cocktail or paper napkins with a print you like
Mod Podge and a foam brush
scissors, paper towels
Dried flowers:
Trim the stems short, half an inch or less.
Dot hot glue on the flower.
Work in a cluster or scatter. Use your creativity!
Painted:
Wash and dry the pumpkin first.
Big simple shapes. Stripes, a checkerboard, color-blocking the whole thing one color, a leopard print if you're feeling brave! The possibilities are endless
Thin coats, let each dry a few minutes before the next. Craft acrylic dries fast.
Mod podged napkins:
Peel the napkin apart down to just the printed top layer. A full-thickness napkin goes lumpy and won't lie flat on a curve.
Tear or cut the shapes you want.
Brush a thin layer of Mod Podge onto the pumpkin, lay the napkin down, then brush more over the top, working from the center out.
Wrinkles are going to happen on a round surface. Let them. Fighting them tears the napkin and it looks fine when it dries!
What We Ate/Drank —
I kept the food to things you eat standing up with one hand, because everyone's holding a glue gun. A cookie plate from the bakery: I am not above a store-bought cookie on a weeknight and neither should you be! Put it on a nice plate and it's a cookie plate. Chocolate covered apples, which took me five minutes and are their own post. And raspberry margaritas, which were perfectly refreshing!
The Results —
What You Need —
I will always recommend using what you already have, but these are some of the things I purchased. I liked using disposable items so that I could easily customize the items with a sharpie. The personalization of these items is part of what made this night feel so special!
Decor:
my favorite tablecloth (wipeable & versatile!)
basic white bud vases (you’ll use these over and over again)
bistro awning (many color options)
Foodware:
to-go coffee cups (you could thrift a variety of mugs, though!)
